Once your students are registered you are able to search and find any profile under “Search All Members”. However you may wish to organise your students in to groups. We refer to these as Shortlists. You can have as many shortlists as you wish and students can be in multiple shortlists.
Adding to a Shortlist
To get started go to “Search All Members”
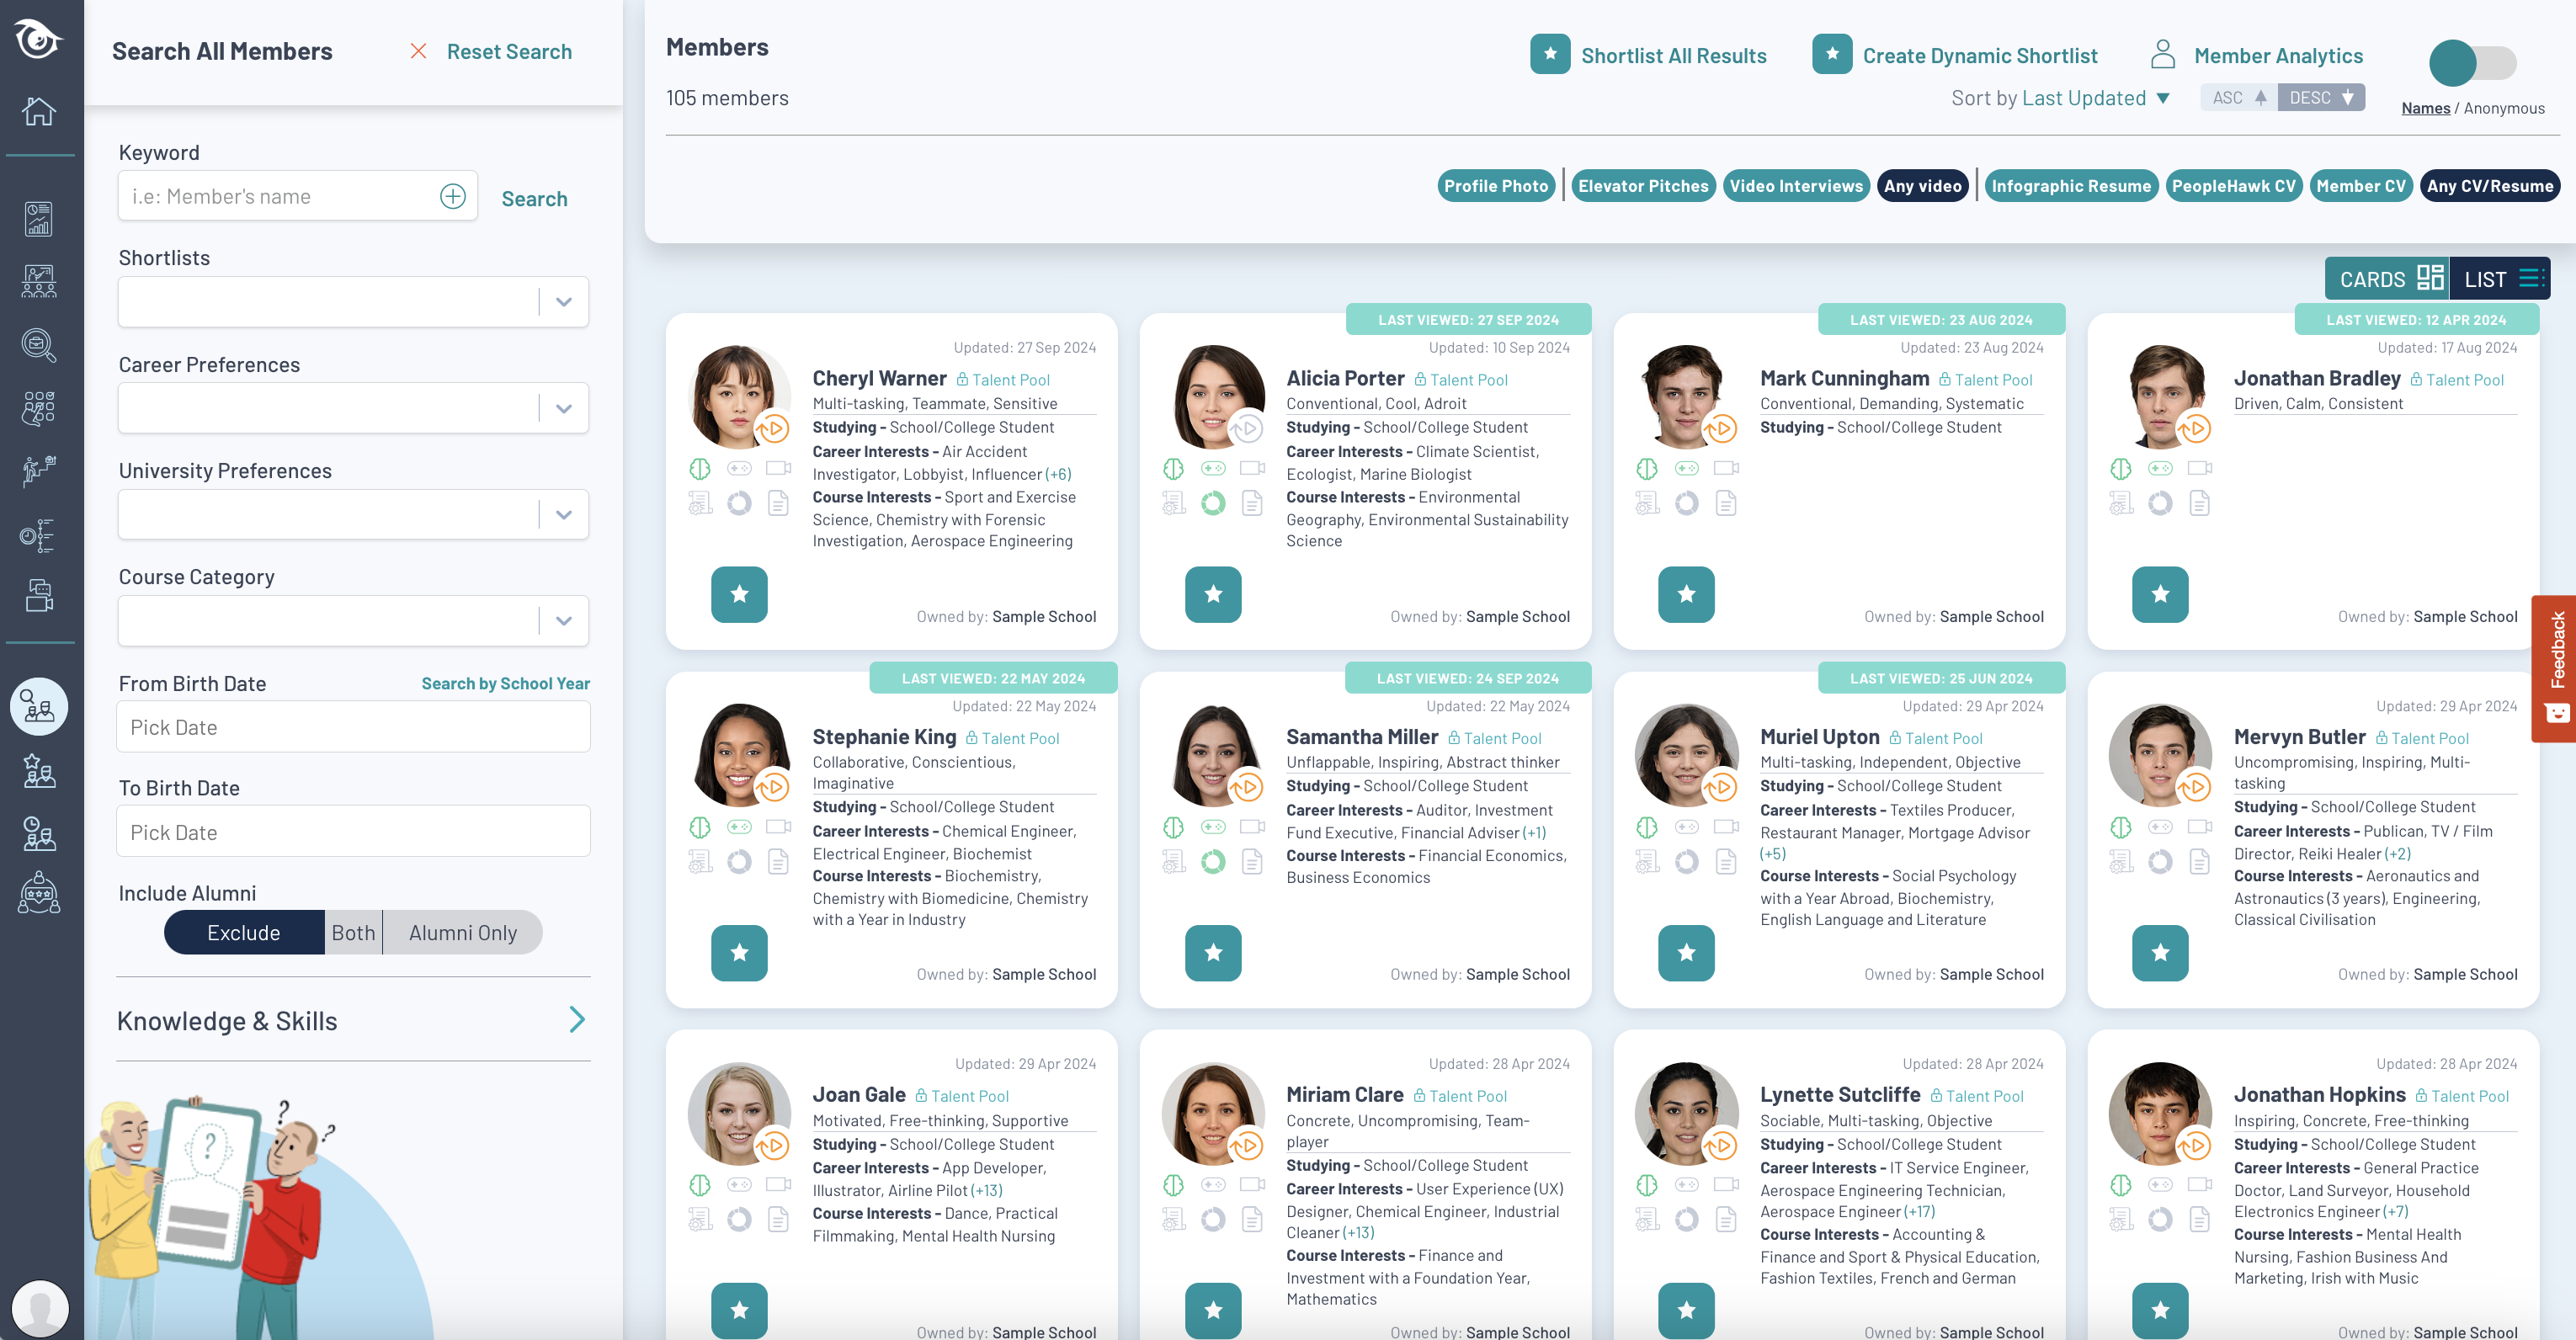
You can add individuals to a Shortlist by clicking on the “star” icon on their card.
If you wish to add everyone then you can perform a search e.g. filter to a Year Group based on date of birth and then click on “Shortlist All Results” at the top of the screen. This will add everyone to the Shortlist at once.
When adding you will prompted if you wish to create a new shortlist or add them to an existing shortlist.
Viewing Shortlists
From the “Shortlists” module you can see a list of all your shortlists and click on any one to view its members.
If you wish to remove someone from a Shortlist simply click on “Remove” below the “star” icon on their card. This simply removes that member from this shortlist, it does not affect other shortlists or the member’s profile.
As you create more and more Shortlists these can be re-arranged in to folders by simply creating a New Folder and then dragging and dropping the shortlist in to the folder. A folder only contains shortlists it does not contain members itself.
Those shortlists you use the most can be starred so they always appear at the top in your Favourites section.
Using Shortlists
Shortlists can be used in many ways.
Within the shortlists module you have options to send a message or notification to everyone within that shortlist.
You can also perform a bulk action such as requesting everyone to complete a feature. This will trigger an email to those members that have not complete that feature as yet.
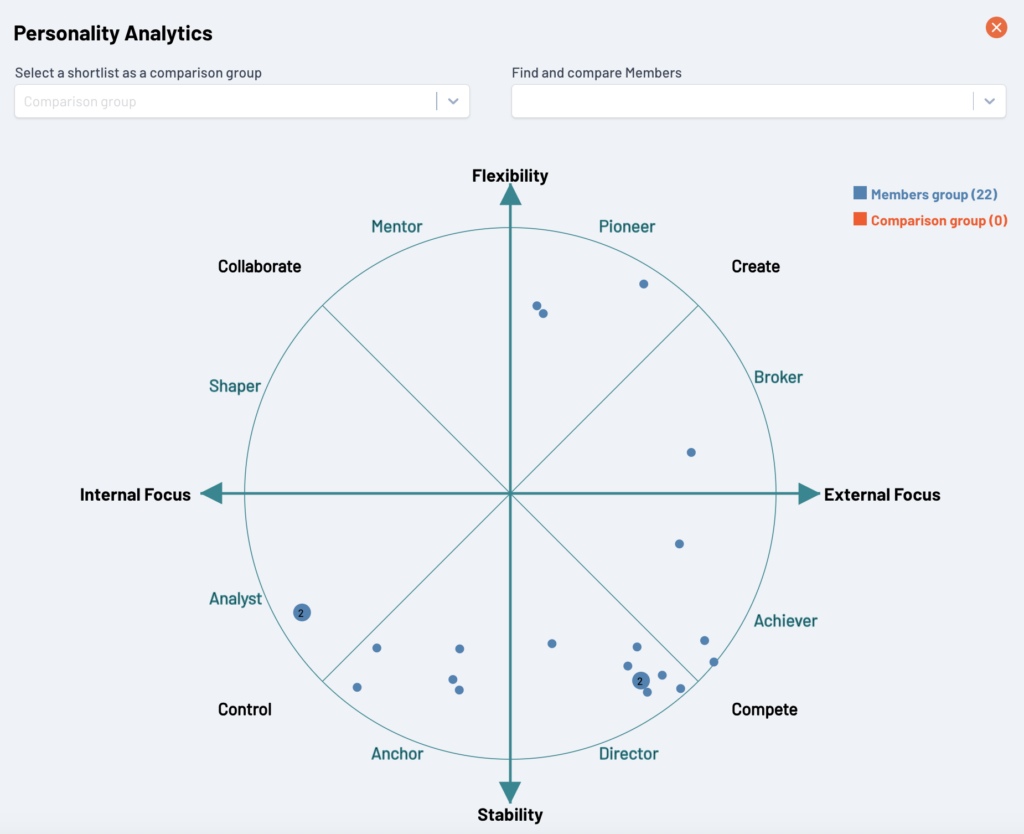
Analytics allow you to view results of multiple members at once such as everyone’s personality type by clicking on “Member Analytics”
A shortlist can also be viewed as table instead of individual member cards.
Within the Reporting module any report can then also be filtered to only show the results for a particular shortlist.
Sharing Shortlists
By default when you create a shortlist it is visible to everyone within your organisation. By clicking “Edit Shortlist” you can adjust these settings.
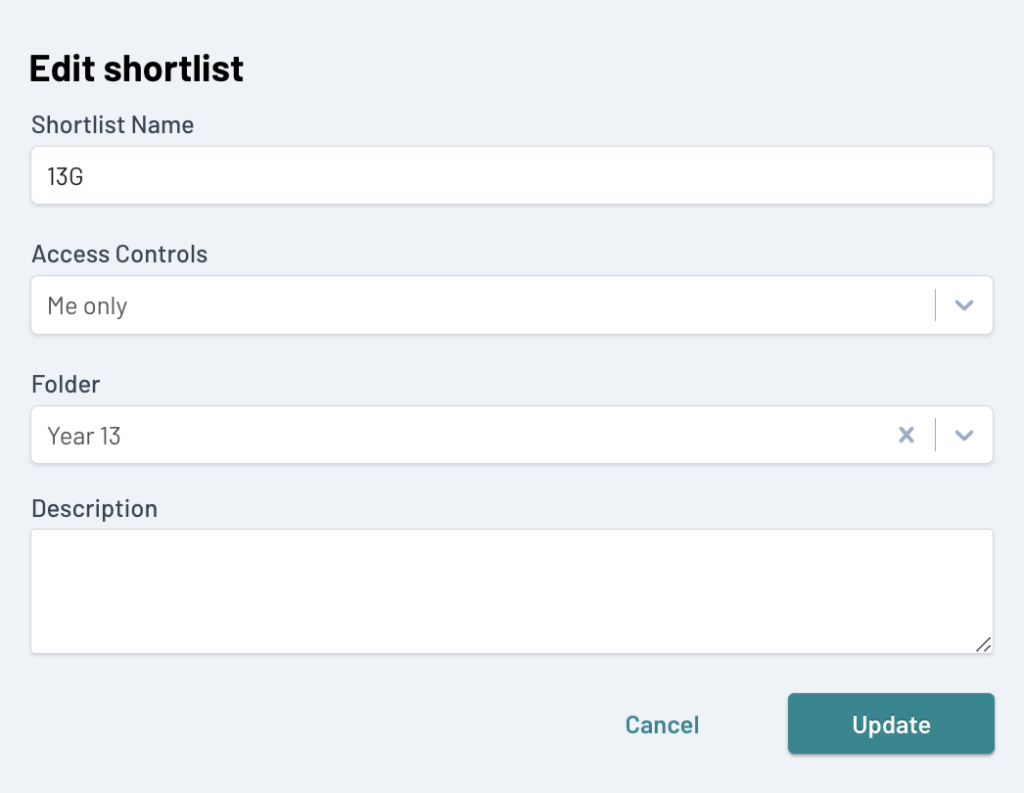
The Access Controls provide three options –
“Me only” – the shortlist will only be visible to you.
“Whole team (view only)” – the shortlist is visible to everyone within your organisation but only you can add or delete members to the shortlist.
“Whole team (edit access)” – the shortlist is visible to everyone within your organisation and can also be editing by anyone, meaning members can be added or deleted to the shortlist.
Sharing Shortlists externally
If you wish to share a shortlist with someone outside of your organisation then this can be done by clicking on “Share Shortlist”. You can then provide an email address and message for who you wish to share it with e.g. external company visiting the school to do interview experience. The recipient will then receive an email with a link giving them access to only those members within the shortlist. Please ensure you have any necessary permissions before sharing.
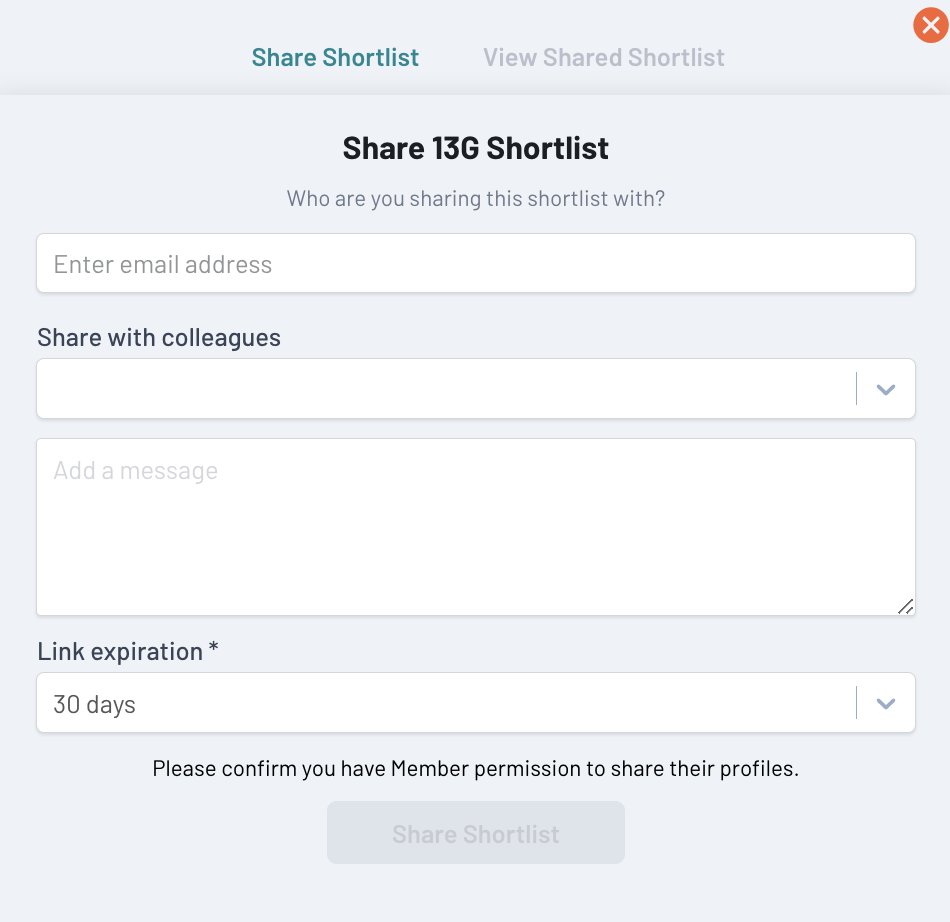
You can also restrict how long the shortlist will be shared for and should you wish to stop sharing you can do this by clicking on the “View Shared Shortlist” tab.
Dynamic Shortlists
A dynamic shortlist allows you to define a search criteria for who the members are rather than adding/deleting specific members. This means the results of a dynamic shortlist can vary depending on your access permissions and as members update their profiles those meeting the search criteria will vary.
These however are useful for providing up to date results of common searches e.g. everyone who has favourited a career within a specific industry.
Most actions that can be performed on a static shortlist can also be performed on a dynamic shortlist however some limitations do exist.